QNAP NAS systems are some of the most user-friendly storage systems for private people and small to medium businesses. They come with a large number of applications, and can upload backups to an S3-compatible storage system, including the Exoscale Object Storage.
Now QNAP has announced official support for deploying their QuTSCloud cloud NAS offering on Exoscale starting with version c4.5.2.
This enables you to use an Exoscale instance as your own NAS-in-the-cloud, taking advantage of all the functionalities of the QNAP Os and combine them with the advantages of an on-demand solution.
Need more RAM, or more compute capacity? Simply scale your instance to bigger instance type. Need a bigger disk? Just scale your instance HD size, no need to buy physical hard drives or to worry about optimization when having different generations and different HD sizes.
You can start using QuTSCloud on Exoscale today by registering the QuTSCloud c4.5.2 image as a custom template, and we hope to be able to release an official template in our Marketplace later on.
Getting Started With QuTScloud on Exoscale
QuTScloud is a cloud-optimized version of the QNAP NAS operating system. You can deploy QuTScloud on Exoscale, start your cloud NAS, and benefit from flexible file management and collaboration that is unavailable from most cloud storage services. With QuTScloud you can immediately experience all the benefits of a QNAP NAS without any hardware requirements or complex maintenance of the cloud environment.
QuTScloud only takes a few clicks to install and allow you to expand your cloud storage as you need using the high-performance SSD-based storage offered by Exoscale compute instance.
In order to get started, you will need to purchase a QuTScloud licenses on the QNAP store. The license must match the number of CPU cores of the instance type you plan to use for hosting the solution.
You can then start to setup your Cloud NAS on Exoscale by:
- registering a custom template for the QuTScloud image
- setup a security group allowing ports 80, 443, 8080 and 22
- create a new QuTScloud image matching the service offering for which you purchased a license for
- initialize your QuTScloud instance with your license
Upon setup, you can start using the various features of QuTScloud such as storage pools, volume and shared folders.
QNAP has published detailed instructions to get you started at: https://www.qnap.com/en-us/how-to/tutorial/article/how-to-deploy-and-install-qutscloud-on-cloud-platforms
Further Integrate QNAP with Exoscale: Backup on Exoscale Object Storage
In addition to running your QuTScloud instance on Exoscale, you can leverage Exoscale’s Object Storage in order to backup safely and cost-effectively your data in any of the Exoscale zones.
A couple of possible scenarios could be:
- Backup your local on-premises QNAP NAS (or any other data source) to the Exoscale Object Storage and use QuTScloud as a bridge to browse / share / mount that data (thanks to QNAP HybridMount) with a simple GUI and all functionalities offered by the QNAP Os.
- Use QuTScloud virtual NAS as a direct on-line data storage solution, and back it up on the Exoscale Object Storage.
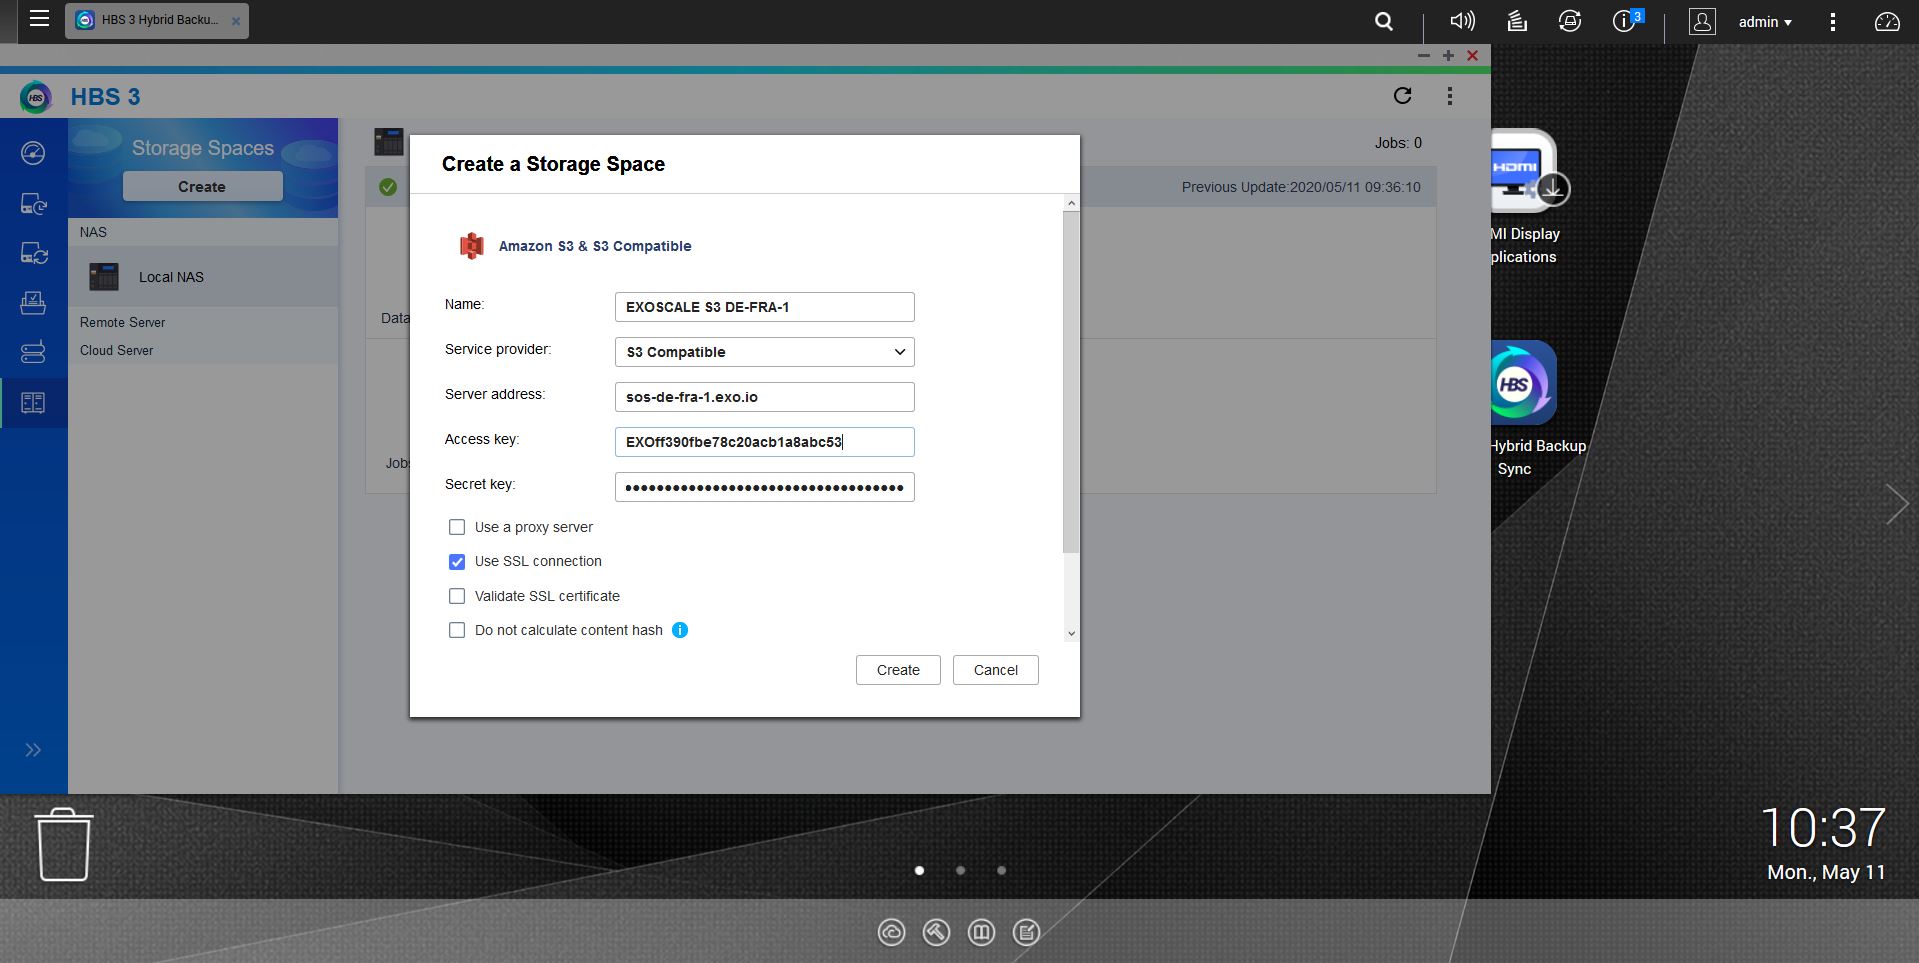
To get started, after having created a bucket and a restricted IAM key for the backup purpose, open your QNAP App Center and install HBS 3 Hybrid Backup Sync.
Use the following details to set up an Amazon S3 & S3 Compatible Storage Space:
- Name: Insert a name for this storage configuration, eg “Exoscale”
- Service Provider: Select S3 Compatible
- Server address: Depending on the zone you selected enter the appropriate endpoint:
- Frankfurt:
sos-de-fra-1.exo.io - Munich:
sos-de-muc-1.exo.io - Vienna:
sos-at-vie-1.exo.io - Geneva:
sos-ch-gva-2.exo.io - Zurich:
sos-ch-dk-2.exo.io - Sofia:
sos-bg-sof-1.exo.io
- Frankfurt:
- Access Key: enter the IAM
Keyyou have previously created. - Secret Key: enter the IAM
Secretof the same key. - Enable Use SSL connection to ensure that the connection to Exoscale is encrypted.
You will then be able to use that storage configuration for a backup job from either your virtual or on-premises QNAP NAS.