Getting started with CoreOS on Exoscale
Choosing a Channel
CoreOS is designed to be [updated automatically][update-docs] with different schedules per channel. You can [disable this feature][reboot-docs], although we don’t recommend it. Read the [release notes][release-notes] for specific features and bug fixes.
The Exoscale CoreOS image is built officially and each CoreOS instance deployment is a unique fresh instance. By default, only stable channel are deployed on Exoscale, you can easily [switch to Beta or Alpha channel][switching-channels].
Security Groups
Unlike other providers, all Exoscale instances are protected by default on inbound traffic. In order to be able to work in a CoreOS cluster you should add the following rules in either your default security group or a security group of your choice and tag all CoreOS instances with it:
- SSH: TCP port 22
- Etcd2: TCP ports 2379 for client communication and 2380 for server-to-server communication
- Etcd (Deprecated): TCP ports 4001 for client communication and 7001 for server-to-server communication
Cloud-Config
CoreOS allows you to configure machine parameters, launch systemd units on startup, and more via cloud-config. Jump over to the [docs to learn about the supported features][cloud-config-docs]. Cloud-config is intended to bring up a cluster of machines into a minimal useful state and ideally shouldn’t be used to configure anything that isn’t standard across many hosts. Once the machine is created, cloud-config cannot be modified.
You can provide raw cloud-config data to CoreOS via the Exoscale portal or via the Exoscale compute API.
The default cloud-config configuration on all Exoscale instances specifies hostname:
#cloud-config
manage_etc_hosts: true
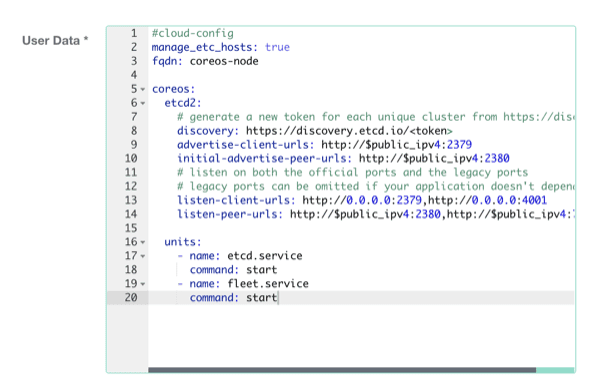
fqdn: coreos-nodeIn order to leverage CoreOS unique automation attributes, a standard CoreOS cloud-config on Exoscale could be configured with:
#cloud-config
manage_etc_hosts: true
fqdn: coreos-node

coreos:
  etcd2:
    # generate a new token for each unique cluster from https://discovery.etcd.io/new?size=3
    # specify the initial size of your cluster with ?size=X
    discovery: https://discovery.etcd.io/<token>
    advertise-client-urls: http://$public_ipv4:2379
    initial-advertise-peer-urls: http://$public_ipv4:2380
    # listen on both the official ports and the legacy ports
    # legacy ports can be omitted if your application doesn't depend on them
    listen-client-urls: http://0.0.0.0:2379,http://0.0.0.0:4001
    listen-peer-urls: http://$public_ipv4:2380,http://$public_ipv4:7001

  units:
    - name: etcd.service
      command: start
    - name: fleet.service
      command: start
Adding More Machines
To add more instances to the cluster, just launch more with the same cloud-config adjusting the FQDN or removing the statement. New instances will join the cluster regardless of location provided that security groups are correctly configured.
Modifying cloud-config
It is possible to modify the cloud-config contents during the lifetime
of an instance. In order to modify the contents, you need to use
the API command updateVirtualMachine with the machine in a stopped
state.
cs stopVirtualMachine id=<UUID of instance>
cs updateVirtualMachine id=<UUID of instance> userData=<base64 encoded value of your cloud-config>
cs startVirtualMachine id=<UUID of instance>
note: switch the request type from GET to POST if the userData payload is longer than 2KB.
API reference for updateVirtualMachine
SSH to your CoreOS instances
CoreOS does not allow root connection to the instance. By default, it uses the core user
instead of root and doesn’t use a password for authentication. You’ll need to
add an SSH key(s) via the web console or add keys/passwords via your cloud-config in order to log in.
To log in to a CoreOS instance after it’s created click on its IP address or run:
ssh core@<ip address>Optionally, you may want to configure your ssh-agent to more easily run fleet commands.
Launching instances
Via the API
Install and configure the command line client (Python required) with your API details
pip install cs
vi $HOME/.cloudstack.ini
[cloudstack]
endpoint = https://api.exoscale.ch/compute
key = api key
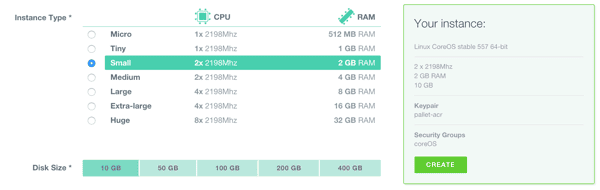
secret = secretTo launch a Small 2GB instance with the current Stable CoreOS image:
note: template ids are available on Exoscale website
cs deployVirtualMachine templateId=2a196b89-0c50-4400-9d42-ef43bcc0fa99 serviceOfferingId=21624abb-764e-4def-81d7-9fc54b5957fb zoneId=1128bd56-b4d9-4ac6-a7b9-c715b187ce11 keyPair=[keypair name]Be sure to specify your SSH key to be able to access the machine. Management of SSH keys is detailed on the SSH key page. For more details, check out Exoscale’s API documentation.
Via the Web Console
- Open the “add new instance” page in the Exoscale web portal.
- Give the machine a hostname, and choose a zone.
- Choose the CoreOS template
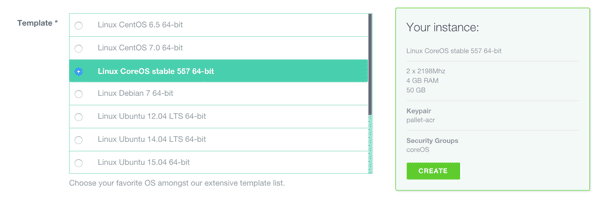
Unlike other Exoscale images where the root password is randomly set at startup, CoreOS does not have password logon activated. You will need to configure your public key with Exoscale in order to login to the CoreOS instances or to specify external keys using cloud-config.
Using CoreOS
Now that you have a machine booted it is time to play around.

