Building a Continuous Delivery Pipeline using CircleCI and Docker
 Alex King
Continuous Integration, Continuous Delivery, and Continuous Deployment have been getting plenty of attention in the software world in recent years. In What is Continuous Integration? we described CI and CD in detail, in this article we will implement a Continuous Delivery Pipeline with CircleCI and Docker.
Deploying software can be a time-consuming process. Whether you’re deploying to dedicated servers, virtual machines, or a Platform as a Service (PaaS), there are often manual steps involved in order to get the software released. Many of these deployment steps can be automated, saving development time, removing the potential for human error, and reducing release cycle times.
Continuous Delivery is all about keeping software in a deployable state. It is so important in modern software development that it forms the first principle of the Agile Manifesto:
Our highest priority is to satisfy the customer through early and continuous delivery of valuable software.
Continuous Integration (CI) can be seen as one of the first steps towards achieving Continuous Delivery. Continuous Integration involves an automated build and test for every commit, aiming to catch any integration errors as quickly as possible.
A deployment pipeline is a series of steps performed on a CI server relating to the testing, building, and deployment of software. The steps will vary depending on the programming languages and build process, and the various layers of tests the team has decided to include.

Continuous Delivery encompasses all the steps from a commit by a developer to preparing a production release. The pipeline shown above consists of three stages: test, build, and deploy, with human intervention needed before the software is deployed. The human involvement could be a manual deploy performed by a release engineer, or something as simple as the click of a button, but it differs from Continuous Deployment where every successful build is released to production:

Choosing a CI Server
When choosing a CI Server you need to decide whether to host your own, which is common with Jenkins, or go with a hosted service such as CircleCI or Travis CI. Hosting your own CI Server is the most flexible option, but it is easier to get started with a hosted solution. Both CircleCI and Travis CI integrate well with GitHub, are free for open source projects, and support Docker builds, so there isn’t much setting them apart.
The principles of CI remain the same regardless of the tool, changes should be pushed to a shared repository and verified by automated tests on a CI server that run after every push to the repository. For this article we will proceed with CircleCI but we could just have easily chosen another CI server, most of the steps will be performed with Docker which makes running builds locally a breeze, and keeps our options open if we want to migrate to a different CI server in the future.
Example CircleCI Workflow with Docker
A CircleCI workflow will form the basis of our Continuous Delivery Pipeline. Our CircleCI workflow will be responsible for building a Docker image, testing a Docker image, pushing a Docker image to Docker Hub, and deploying a Docker image to a VM from CircleCI. To keep things simple we will run a single VM, but the same principles can be applied to deploy to multiple virtual machines and environments.
To demo our CircleCI workflow, we will use a simple NodeJS application that responds with a version number. The application consists of a single file server.js which is shown below. The full source code for this post can be viewed at exoscale/exoscale-circleci-nodejs.
const http = require("http");
const port = 3000;
const app_version = process.env.APP_VERSION;
const server = http.createServer((req, res) => {
res.writeHead(200, {"Content-Type": "text/plain"});
res.write(`Version: ${app_version}`);
res.end();
});
server.listen(port);
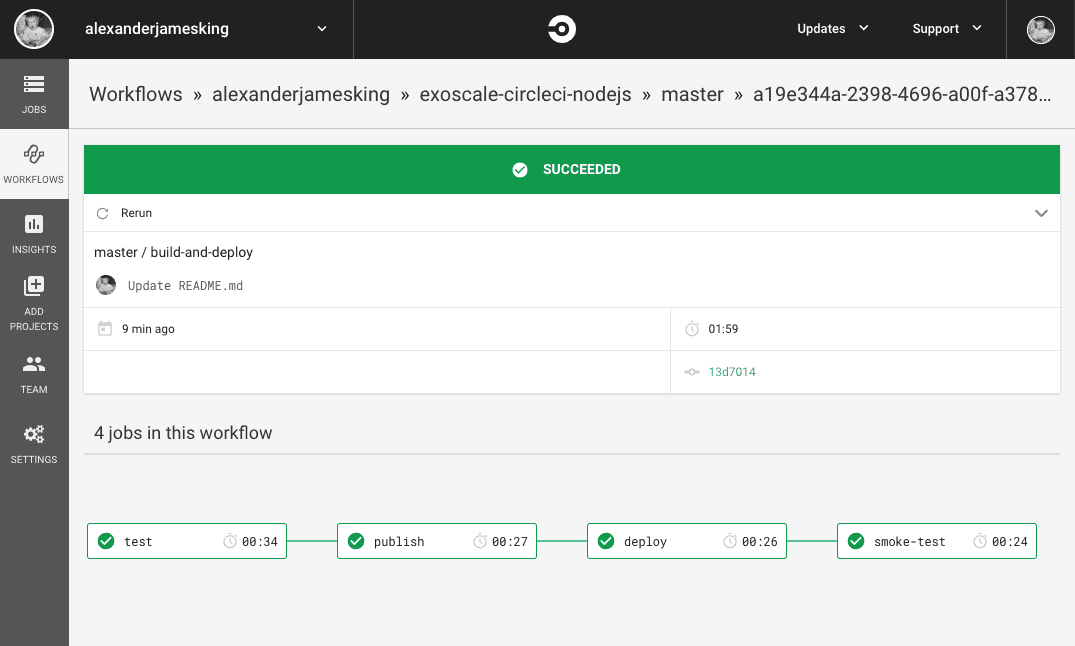
console.log(`Server listening on port:${port} at version:${app_version}`);Our CircleCI workflow will consist of four CircleCI jobs: test, publish, deploy, and smoke-test:

Test
In the test job we build a docker image and run a container based on the Dockerfile. The Docker image is based on an official Node JS Image using Alpine Linux.
Our image will contain application in the server.js file, a test script in test.js, and the version number of the application which is passed to the container via a build-arg which sets the APP_VERSION environment variable used by server.js.
The test job builds a Docker image and starts the Docker container, it executes the test.js script inside the container to check the server is running along with the correct version.
If we are on a git branch other than master, the workflow stops after the test job, while for the master branch we proceed with the publish job.
Publish
The publish job builds a docker image and tags it with the CIRCLE_SHA1, which is also the SHA1 hash of the git commit that triggered the CI build. It logs in to Docker Hub using your details provided in the CircleCI context, then pushes the image to the Docker Hub repository.
You will need a Docker Hub account in order to publish the Docker image.
Deploy
Following a successful publish to Docker Hub, the application is then deployed to the VM. The deploy job extracts the private key from the CircleCI context and runs deploy.sh on the VM via SSH.
The deploy script pulls the latest image from Docker Hub, stops the existing application and removes the container from the VM, then runs a container based on the latest image.
Smoke Test
A smoke test (also known as a confidence test, a sanity test, and a build verification test) is a non exhaustive test that checks the application is up and running. The idea is not to cover every single feature of the application, but to check a few basic features work to give us confidence that the deploy at least partially worked.
To keep things simple, the example application in this article only has a single feature so the smoke test is exhaustive, but a more realistic example may be for a cloud provider to check that the sign-up process still works following a deploy, or to check a user can start a Virtual Machine. For an online shopping site a smoke test may involve checking a user can add items to their cart and proceed to the checkout page. The idea is to catch problems early, if we know the application is not working following a deploy we can potentially automate rollback to a known version that works or at the very least alert an engineer of the problem so it can be fixed as a priority.
The smoke test in our example runs following a successful deploy, it runs test.js inside a container on the CI build which runs against the deployed VM, polling until the VM returns the expected version number or the maximum attempts have been exceeded.
Building your own Continuous Delivery pipeline with CircleCI and Docker
The following steps will now guide you through setting up your own Continuous Delivery pipeline.
Fork the Repository
Fork exoscale/exoscale-circleci-nodejs.
The repository consists of server.js our application, test.js and configuration files for CircleCI and Docker builds.
Create Resources
To create the resources needed for this example you will need an Exoscale account, and the Exoscale CLI installed for provisioning Exoscale resources via the command line.
Create a Firewall
Before we can create a VM we need to set up a firewall. By default, all incoming traffic to an Exoscale VM is forbidden so we need to open up ports to allow for incoming traffic. We will open up ports allowing ping, HTTP and SSH.
The following commands will set up a firewall called circleci-demo using the CLI. Alternatively, you can set up firewall rules in the Portal.
exo firewall create circleci-demo
exo firewall add circleci-demo ping ssh http
You can run exo firewall list to show all of your firewalls:
┼───────────────┼────────────────────────┼
│     NAME      │      DESCRIPTION       │
┼───────────────┼────────────────────────┼
│ default       │ Default Security Group │
│ circleci-demo │                        │
┼───────────────┼────────────────────────┼
And exo firewall show circleci-demo to list the rules for the firewall:
┼─────────┼────────────────┼──────────┼─────────────┼
│  TYPE   │     SOURCE     │ PROTOCOL │    PORT     │
┼─────────┼────────────────┼──────────┼─────────────┼
│ INGRESS │ CIDR 0.0.0.0/0 │ icmp     │ 8, 0 (Echo) │
│         │ CIDR 0.0.0.0/0 │ tcp      │ 22 (ssh)    │
│         │ CIDR 0.0.0.0/0 │ tcp      │ 80 (http)   │
┼─────────┼────────────────┼──────────┼─────────────┼
Provision a Virtual Machine
Now we have our firewall, we will provision a VM using the CLI with the circleci-demo security group and the Linux CoreOS 1688 64-bit template which comes with Docker pre-installed:
exo vm create circleci-demo -s circleci-demo -t 'Linux CoreOS 1688 64-bit'You can check the IP of the machine by running exo vm list. The name and security group should match those in the docker-machine command.
┼────────────────┼────────────────┼───────────────┼─────────┼──────────┼──────────────────┼
│      NAME      │ SECURITY GROUP │   IP ADDRESS  │ STATUS  │   ZONE   │       ID         │
┼────────────────┼────────────────┼───────────────┼─────────┼──────────┼──────────────────┼
│ circleci-demo  │ circleci-demo  │ YOUR_IP       │ Running │ ch-gva-2 │ YOUR_INSTANCE_ID │
┼────────────────┼────────────────┼───────────────┼─────────┼──────────┼──────────────────┼
A private key was created by exo when we provisioned the VM, this can be found in your home directory:
~/.exoscale/instances/YOUR_INSTANCE_ID/id_rsaWe will need the private key in order to SSH into the VM from CircleCI, as the key is a multi line string we will use base64 to encode the key before adding it to CircleCI as per Encoding Multi-Line Environment Variables:
cat ~/.exoscale/instances/YOUR_INSTANCE_ID/id_rsa | base64This private key should not be uploaded to GitHub, we will pass it to our build using CircleCI contexts.
Set up a CircleCI Context
Now have a firewall with the necessary ports open, a VM running docker, and a repository on your GitHub account containing the example application. The next step is to configure your CircleCI build using a CircleCI Context.
If you don’t have one already, sign up for a CircleCI account using your GitHub account.
Set the following environment variables on the ‘Settings’ tab` on your CircleCI Dashboard.
Create a new context called exoscale with the environment variables:
DOCKER_USERYour DockerHub usernameDOCKER_PASSYour DockerHub passwordDOCKER_IMAGEYOUR_DOCKER_HUB_USERNAME/exoscale-circleci-nodejsVM_IPThe IP Address of your VM obtained from runningexo vm listID_RSAThe base64 encoded private key for your instance
The contexts will show as ‘Public’ on your CircleCI Dashboard, this means that anyone in your organization can access the context at runtime, forks of your project will not have access to your credentials.
Add the project in CircleCI:
- Navigate to your CircleCI Dashboard and click on ‘Add Projects’
- Find your repository in the list and click the ‘Set Up Project’ button
- CircleCI will now give you some example configurations for different projects, we already have our
.circleci/config.ymlconfigured so you can click the Start building button
Test the Pipeline
We now have our VM running, and a basic Continuous Delivery pipeline in place.
- Add a commit (a simple update to the
README.mdwill suffice) and push to the repository to trigger a build. - Navigate to your CircleCI Dashboard and click on ‘Workflows’ in the left hand navigation. You should see your
exoscale-circleci-nodejsproject listed.
The build should now run through the jobs in our workflow, and as each job passes, the subsequent job will start, and if all is well you will see a green success badge next to your build.
You can do a quick manual test to verify for yourself that the pipeline worked:
- Run
exo vm listto see the IP Address of your VM. - Run curl with the IP address of your VM:
curl YOUR_INSTANCE_IP - The service should respond with the version number matching the latest build id in CircleCI, e.g.
Version: 18165a5f4f7af79b01d42a2058f6b84022762318
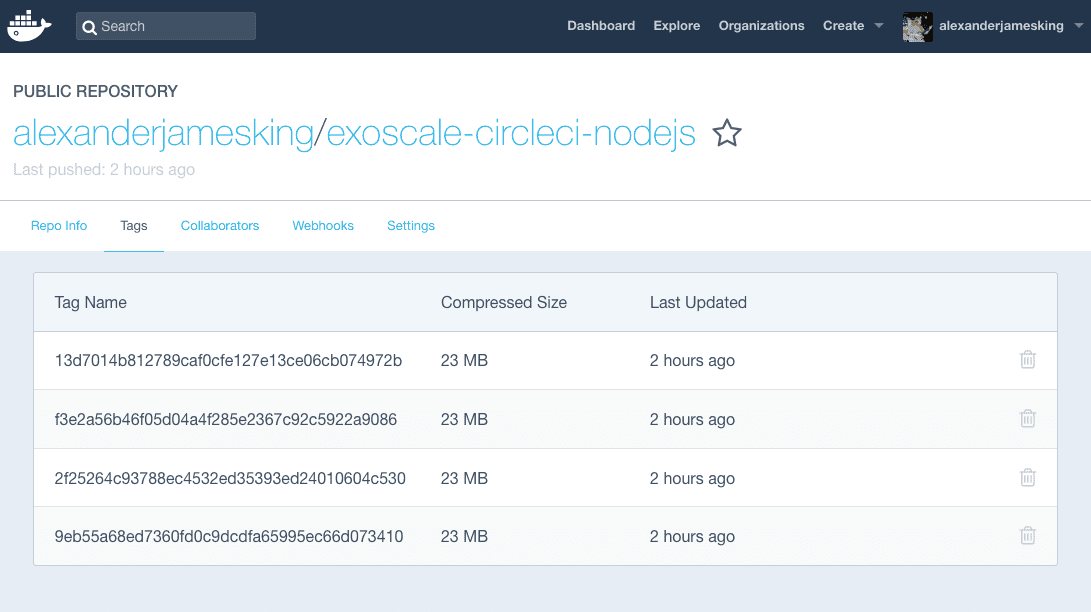
For each version of the application built on CI there will also be a corresponding tag on you Docker Hub account:
A Production Ready, Continuous Delivery Pipeline
We have now built a Continuous Delivery pipeline using a CircleCI workflow, with every commit to the master branch resulting in a new deploy. For a small static website this may be a perfectly acceptable solution, but in reality, this is just a taster for what is possible.
For a larger application we can introduce multiple environments, so the code can be tested on a staging environment before proceeding to deploy to production. By provisioning two VMs we can easily transform the pipeline we have just set up into something more elaborate, with jobs running in parallel, and a set of smoke tests running against a staging environment, followed by the same steps on production:

With a single node deployment there is always a risk of downtime. We can improve our pipeline and achieve a higher availability by deploying to multiple nodes using Docker Swarm and implementing Automatic failover using Elastic IPs. For cases where a service is critical, we can further improve this by implementing Blue-Green deploys and testing in production before putting it live to our customers.
In this example we used Docker Hub as our image repository, for cases where you want to keep your application image private you can host your own Secure Private Docker Registry on Exoscale Object Storage.
For the sake of simplicity we used HTTP in this tutorial, but for a production application we could introduce Traefik or Nginx to serve our application over HTTPS with Let’s Encrypt. For more information, see Let’s Encrypt wildcard certificates for an example of how this can be implemented on Exoscale.
Your Continuous Delivery pipeline and tech stack can grow along with your application. If you’re new to Continuous Delivery then it’s a good idea to start with something small. As your product grows, and as your team become comfortable working with containers, you can start thinking about Kubernetes for an extremely powerful solution to managing deployments at an enterprise scale.
With the great tools available to you today, Continuous Delivery is achievable for even the smallest of projects. Start small, think big!