---
title: "Connecting to your cluster using GitLab and OIDC"
description: "Learn how to configure an SKS cluster with OIDC to enable access through GitLab as the identity provider"
date: 2024-11-20
author: "Luc Juggery"
tags: ["kubernetes","tutorial"]
url: https://www.exoscale.com/blog/exoscale-sks-oidc-gitlab/
---
# Connecting to your cluster using GitLab and OIDC
**Quick summary of this article**
- Use GitLab as an OpenID Connect provider to authenticate users against an Exoscale SKS Kubernetes cluster.
- Configure OIDC parameters on the API server including issuer URL, client ID, username and groups claims.
- Provision the SKS cluster with Pulumi including security groups, nodepool, and kubeconfig generation for automation.
- Install kubelogin oidc-login via Krew to enable kubectl to obtain ID tokens from GitLab for authentication.
- Map GitLab groups to Kubernetes RBAC using ClusterRole and ClusterRoleBinding to enforce role based access control.
In this article we’ll explore how to connect to an SKS Kubernetes cluster using GitLab as the OpenID provider. We’ll use users and groups defined in GitLab to control access to the resources within the cluster.
## A quick introduction to OpenID connect
OpenID Connect is defined as "an authentication protocol based on OAuth 2.0. It simplifies the way to verify the identity of users based on the authentication performed by an Authorization Server and to obtain user profile information in an interoperable and REST-like manner."
It basically allows an application to delegate authentication and authorization to an external Identity Provider. The following sequence diagram illustrates how OIDC is used in the context of Kubernetes, with the kubectl binary as the client application.
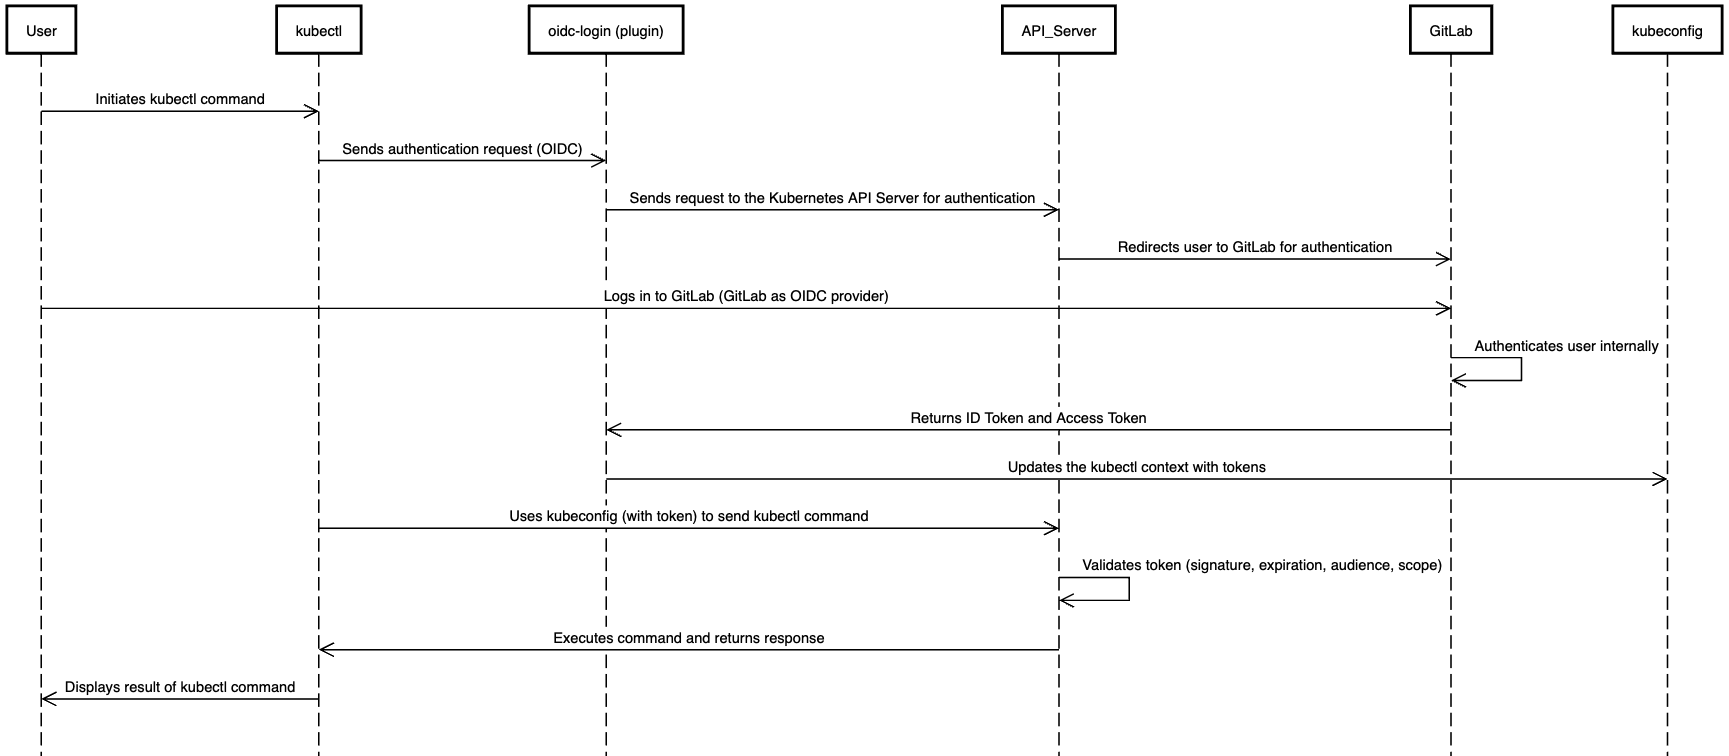
In this diagram, we introduced the *oidc-login* component, a kubectl plugin responsible for interacting with the Identity Provider during the authentication process. We'll give more details about this component shortly.
## Creating a GitLab application
To use GitLab as the identity provider, we first need to create an application.
Note: the examples in this article use [Techwhale](https://gitlab.com/techwhale), a GitLab group created for demo purposes.
From [GitLab](https://gitlab.com), we navigate to the settings of the Techwhale group and create a new application. We give the application the name of our choice, select the *openid*, *profile* and *email* scopes, and set the redirect URL to ```http://localhost:8000``` (this URL is set to the one the *oidc-login* plugin listens on).
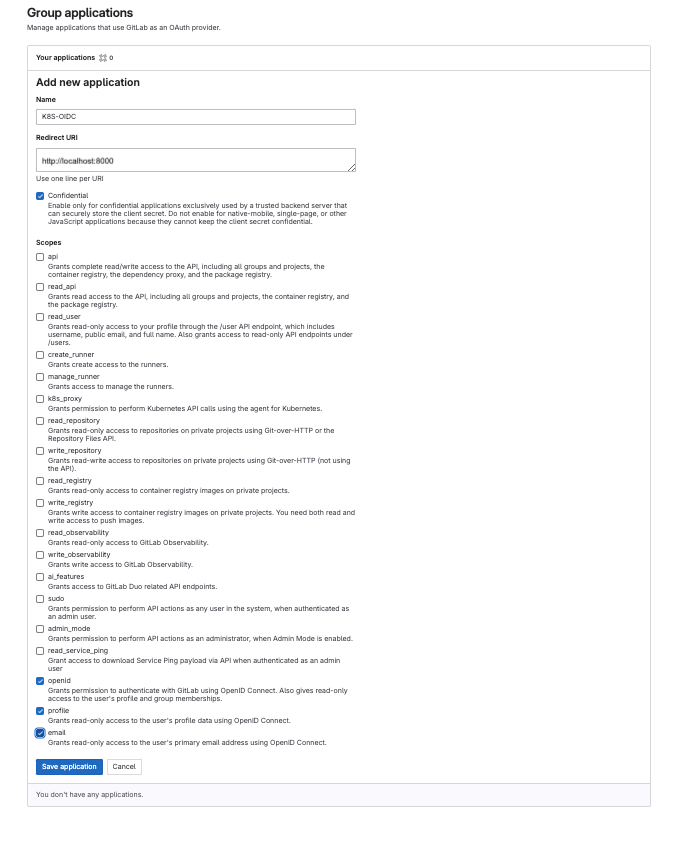
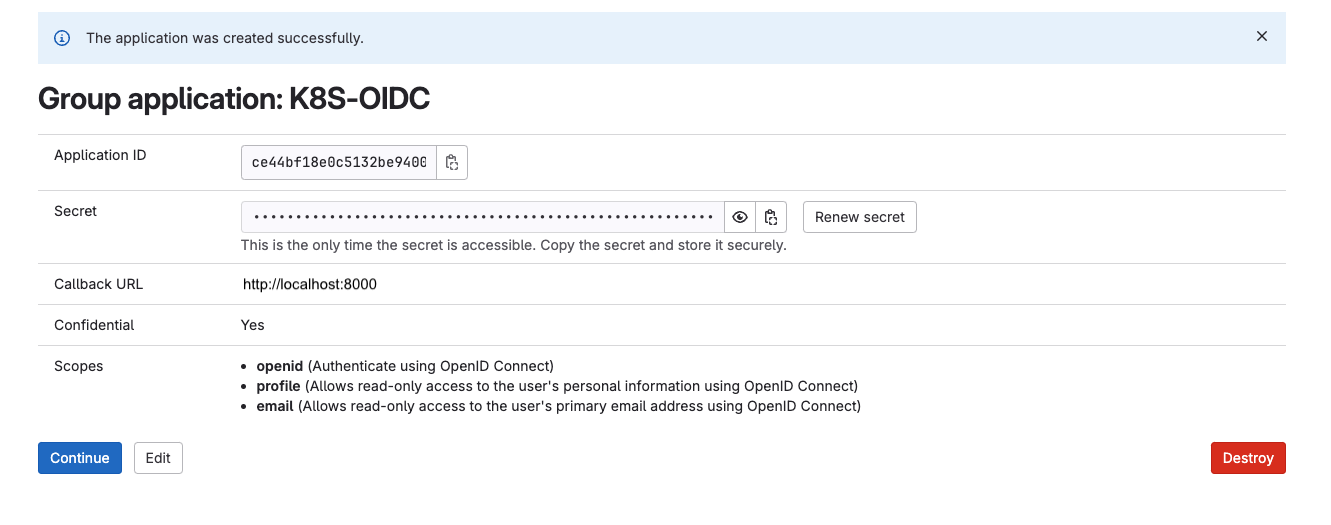
Once the application is created, we are provided with the client ID and client secret. We save them in the CLIENT_ID and CLIENT_SECRET environment variables, as we will need them later.
## OIDC parameters
When creating a SKS cluster, specific parameters can be used to configure the OIDC connectivity:
- client-id : OpenID client ID
- issuer-url : OpenID provider URL
- username-claim : JWT claim to use as the user name
- username-prefix : Prefix prepended to username claims
- groups-claim : JWT claim to use as the user's group
- groups-prefix : Prefix prepended to group claims
- required-claim : key value map that describes a required claim in the ID Token
These parameters configure the API Server of the cluster to interact with the Identity Provider during the authentication process, enabling OIDC-based authentication.
## Creating an SKS cluster with Pulumi
Several tools can be used to create an Exoscale SKS managed cluster:
- [Terraform](https://www.terraform.io)
- [Pulumi](https://www.pulumi.io)
- the [exo CLI](https://community.exoscale.com/documentation/tools/exoscale-command-line-interface/)
- the [Exoscale web portal](https://portal.exoscale.com/)
In this example we use the IaC (Infrastructure as Code) approach with Pulumi. First we create a folder named *sks* and copy the following Pulumi.yaml file inside it:
```yaml
name: sks-template
runtime: yaml
description: SKS cluster management
config:
zone:
type: string
version:
type: string
size:
type: integer
instanceType:
type: string
outputs:
kubeconfig: ${kubeconfig.kubeconfig}
resources:
exoscale-provider:
type: pulumi:providers:exoscale
defaultProvider: true
options:
version: 0.59.2
securityGroup:
type: exoscale:SecurityGroup
properties:
description: Security group for Kubernetes nodes
name: sg-${pulumi.stack}
securityGroupRulesNodePorts:
type: exoscale:SecurityGroupRule
properties:
securityGroupId: ${securityGroup.id}
type: INGRESS
protocol: TCP
cidr: 0.0.0.0/0
startPort: 30000
endPort: 32767
securityGroupRulesKubelet:
type: exoscale:SecurityGroupRule
properties:
securityGroupId: ${securityGroup.id}
type: INGRESS
protocol: TCP
userSecurityGroupId: ${securityGroup.id}
startPort: 10250
endPort: 10251
securityGroupRulesPrometheus:
type: exoscale:SecurityGroupRule
properties:
securityGroupId: ${securityGroup.id}
type: INGRESS
protocol: TCP
userSecurityGroupId: ${securityGroup.id}
startPort: 9100
endPort: 9100
securityGroupRulesCiliumVXLAN:
type: exoscale:SecurityGroupRule
properties:
securityGroupId: ${securityGroup.id}
type: INGRESS
protocol: UDP
userSecurityGroupId: ${securityGroup.id}
startPort: 8472
endPort: 8472
securityGroupRulesCiliumHCICMP:
type: exoscale:SecurityGroupRule
properties:
securityGroupId: ${securityGroup.id}
type: INGRESS
protocol: ICMP
userSecurityGroupId: ${securityGroup.id}
icmpCode: 0
icmpType: 8
securityGroupRulesCiliumHCTCP:
type: exoscale:SecurityGroupRule
properties:
securityGroupId: ${securityGroup.id}
type: INGRESS
protocol: TCP
userSecurityGroupId: ${securityGroup.id}
startPort: 4240
endPort: 4240
cluster:
type: exoscale:SksCluster
properties:
autoUpgrade: false
cni: cilium
description: demo SKS cluster
exoscaleCcm: true
exoscaleCsi: true
metricsServer: true
name: sks-${pulumi.stack}
serviceLevel: starter
oidc:
clientId: ${clientId}
issuerUrl: ${issuerUrl}
usernameClaim: ${usernameClaim}
usernamePrefix: ${usernamePrefix}
groupsClaim: ${groupsClaim}
groupsPrefix: ${groupsPrefix}
version: ${version}
zone: ${zone}
nodepool:
type: exoscale:SksNodepool
properties:
clusterId: ${cluster.id}
name: sks-${pulumi.stack}
zone: ${zone}
instanceType: ${instanceType}
size: ${size}
securityGroupIds:
- ${securityGroup.id}
options:
replaceOnChanges:
- name
kubeconfig:
type: exoscale:SksKubeconfig
properties:
clusterId: ${cluster.id}
earlyRenewalSeconds: 0
groups:
- system:masters
ttlSeconds: 0
user: kubernetes-admin
zone: ${cluster.zone}
```
This file defines the details of the Exoscale resources to be created as listed below. It also specifies that a kubeconfig file will be generated to enable access to the cluster:
- security group
- security group rules
- cluster
- node pool
Next we make sure the following environment variables are set:
- EXOSCALE_API_KEY and EXOSCALE_API_SECRET which are used to access the Exoscale API programmatically.
- CLIENT_ID / CLIENT_SECRET which contain the identifiers of the GitLab application we created in the previous section.
Note: the API_KEY and API_SECRET can be created from the IAM section in the Exoscale portal.
Next we initialize a new Pulumi stack (read: environment) named *gitlab* (the naming is arbitrary):
```bash
pulumi stack init gitlab
```
Then we configure this stack with the following parameters:
```bash
pulumi config set zone "ch-gva-2"
pulumi config set version "1.31.1"
pulumi config set size 2
pulumi config set instanceType "standard.medium"
pulumi config set clientId "${CLIENT_ID}"
pulumi config set issuerUrl "https://gitlab.com"
pulumi config set usernameClaim "preferred_username"
pulumi config set usernamePrefix "oidc:"
pulumi config set groupsClaim "groups_direct"
pulumi config set groupsPrefix "oidc:"
```
These commands replace the variables existing in the *Pulumi.yaml* file, setting the cluster characteristics and the values of the OIDC parameters.
Then, we deploy this Pulumi stack.
```bash
pulumi up
```
Note: it’s a good practice to run the ```pulumi preview``` command before ```pulumi up``` to verify the resources that will be created
It takes around 2 minutes for the cluster to be up and running. Once it's ready, we retrieve the kubeconfig file and configure our local *kubectl*:
```bash
pulumi stack output kubeconfig --show-secrets > kubeconfig
export KUBECONFIG=$PWD/kubeconfig
```
## Adding OIDC parameters to kubeconfig
As mentioned earlier we’ll use [kubelogin](https://github.com/int128/kubelogin), a kubectl plugin also known as oidc-login. It allows kubectl to communicate with an Identity Provider for user authentication.
The simplest installation method for a kubectl plugin is to first install [Krew - Kubernetes Plugins Manager](https://krew.sigs.k8s.io/). Krew is a kubectl plugin that manages other plugins, and it can be installed by following [these instructions](https://krew.sigs.k8s.io/docs/user-guide/setup/install/)
Once Krew is installed, we can use it to install the *oidc-login* plugin:
```
kubectl krew install oidc-login
```
After installing oidc-login, we can run the following command to verify the content of the ID Token and get the oidc-login configuration information.
```bash
kubectl oidc-login setup --oidc-issuer-url=https://gitlab.com --oidc-client-id=${CLIENT_ID} --oidc-client-secret=${CLIENT_SECRET}
```
First we are prompted to log in to GitLab. Once logged in, we will receive a command to run in order to configure the kubectl client. In our case, this command will look similar to the following:
```bash
kubectl config set-credentials oidc \
--exec-api-version=client.authentication.k8s.io/v1beta1 \
--exec-command=kubectl \
--exec-arg=oidc-login \
--exec-arg=get-token \
--exec-arg=--oidc-issuer-url=https://gitlab.com \
--exec-arg=--oidc-client-id=REDACTED \
--exec-arg=--oidc-client-secret=REDACTED
```
It creates a new user named **oidc** in the kubeconfig file:
```bash
- name: oidc
user:
exec:
apiVersion: client.authentication.k8s.io/v1beta1
args:
- oidc-login
- get-token
- --oidc-issuer-url=https://gitlab.com
- --oidc-client-id=REDACTED
- --oidc-client-secret=REDACTED
command: kubectl
env: null
provideClusterInfo: false
```
In a next section, we’ll demonstrate how to use this user to issue kubectl commands against the API Server.
## Setting up GitLab groups
Several subgroups and users were created in [TechWhale](https://gitlab.com/techwhale):
- user *techwhale-dev* is member of subgroup *techwhale/viewer*
- user *techwhale-admin* is member of subgroup *techwhale/admin*
In the next section we’ll use Kubernetes RBAC to restrict these subgroups' access to a specific list of actions and resource types.
## Creating ClusterRole and ClusterRoleBinding
Our requirements are as follows:
- Users in the *techwhale/viewer* group should only have read-only access to the main resources in the cluster (Deployments, Pods, ConfigMaps, ...)
- Users in the *techwhale/admin* group should have full access to those resources
To meet these requirements, we create the necesseray **ClusterRoles** and **ClusterRoleBindings** as defined in *roles.yaml*:
```yaml
# Admin ClusterRole
apiVersion: rbac.authorization.k8s.io/v1
kind: ClusterRole
metadata:
name: gitlab-oidc-admin
rules:
- apiGroups: [""]
resources: ["pods", "services", "configmaps", "secrets"]
verbs: ["get", "list", "watch", "create", "update", "delete"]
- apiGroups: ["apps"]
resources: ["deployments", "daemonsets", "statefulsets"]
verbs: ["get", "list", "watch", "create", "update", "delete"]
- apiGroups: ["batch"]
resources: ["jobs", "cronjobs"]
verbs: ["get", "list", "watch", "create", "update", "delete"]
---
# Admin ClusterRoleBinding
apiVersion: rbac.authorization.k8s.io/v1
kind: ClusterRoleBinding
metadata:
name: gitlab-oidc-admin
subjects:
- kind: Group
name: "oidc:techwhale/admin"
apiGroup: rbac.authorization.k8s.io
roleRef:
kind: ClusterRole
name: gitlab-oidc-admin
apiGroup: rbac.authorization.k8s.io
---
# Viewer ClusterRole
apiVersion: rbac.authorization.k8s.io/v1
kind: ClusterRole
metadata:
name: gitlab-oidc-viewer
rules:
- apiGroups: [""]
resources: ["pods", "services", "configmaps"]
verbs: ["get", "list", "watch"]
- apiGroups: ["apps"]
resources: ["deployments", "daemonsets", "statefulsets"]
verbs: ["get", "list", "watch"]
- apiGroups: ["batch"]
resources: ["jobs", "cronjobs"]
verbs: ["get", "list", "watch"]
---
# Viewer ClusterRoleBinding
apiVersion: rbac.authorization.k8s.io/v1
kind: ClusterRoleBinding
metadata:
name: gitlab-oidc-viewer
subjects:
- kind: Group
name: "oidc:techwhale/viewer"
apiGroup: rbac.authorization.k8s.io
roleRef:
kind: ClusterRole
name: gitlab-oidc-viewer
apiGroup: rbac.authorization.k8s.io
```
This file defines 4 resources:
- ClusterRole *gitlab-oidc-viewer* gives read access to the Pods, Services, Deployments, DaemonSets, StatefulSets, Jobs, CronJobs, and ConfigMaps existing in the cluster. It is associated to the *oidc:techwhale/viewer* group via the *gitlab-oidc-viewer* ClusterRoleBinding.
- ClusterRole *gitlab-oidc-admin* gives read and write access to these resources. It is associated to the *oidc:techwhale/admin* group via the *gitlab-oidc-admin* ClusterRoleBinding.
For instance: if a GitLab user belongs to the *techwhale/viewer* group, the "oidc:" prefix will be prepended to the group name during the authentication process. The API Server will then only allow the actions specified in the *gitlab-oidc-viewer* cluster role, as this one is associated to the oidc:techwhale/viewer group. The following command creates these RBAC resources:
```bash
$ kubectl apply -f roles.yaml
clusterrole.rbac.authorization.k8s.io/gitlab-oidc-admin created
clusterrolebinding.rbac.authorization.k8s.io/gitlab-oidc-admin created
clusterrole.rbac.authorization.k8s.io/gitlab-oidc-viewer created
clusterrolebinding.rbac.authorization.k8s.io/gitlab-oidc-viewer created
```
In the next section we’ll verify that the authentication and authorization mechanism is correctly configured.
## Verifying the entire flow
First we set the *oidc* user in the kubeconfig as the default one. This ensures the kubectl command will be authenticated by the OIDC provider (GitLab in our case) unless another user is specified:
```bash
kubectl config set-context --current --user=oidc
```
Next we ensure that we are signed out of GitLab in our browser. We may also need to clear the cache of the oidc-login plugin (located in $HOME/.kube/cache/oidc-login)
Then we create a simple Deployment:
```bash
kubectl create deploy www --image=nginx:1.24
```
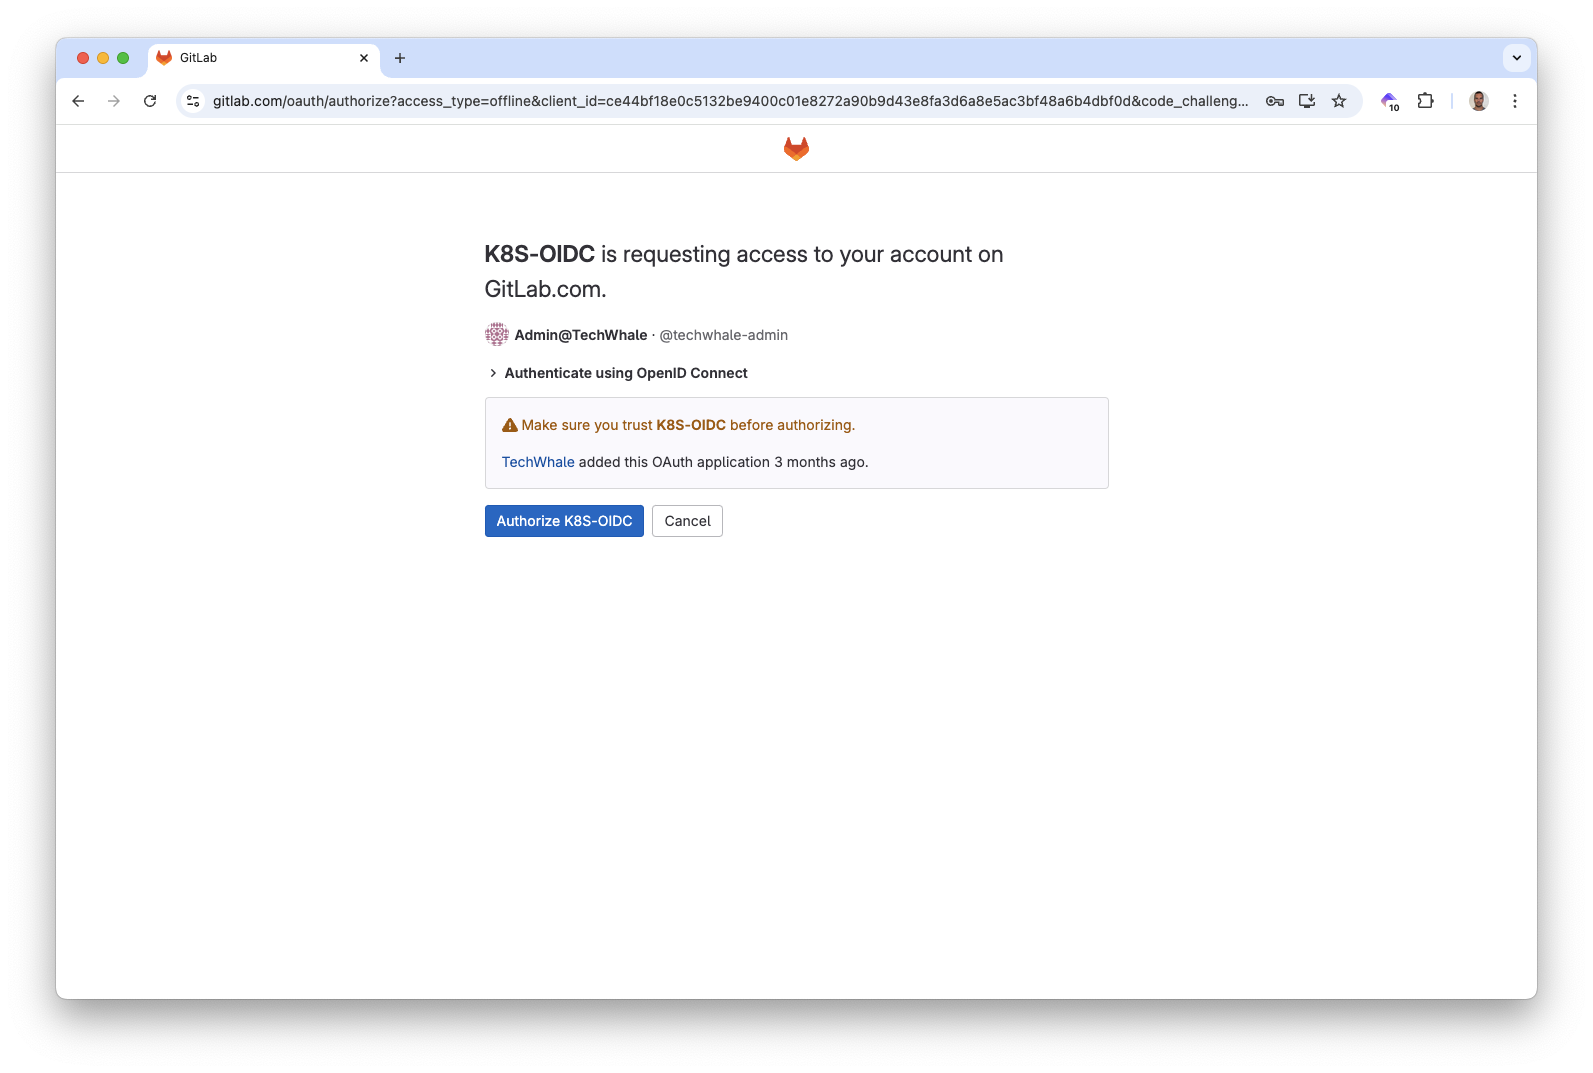
A browser opens to [GitLab](https://gitlab.com) prompting for authentication. We log in as *techwhale-admin*.
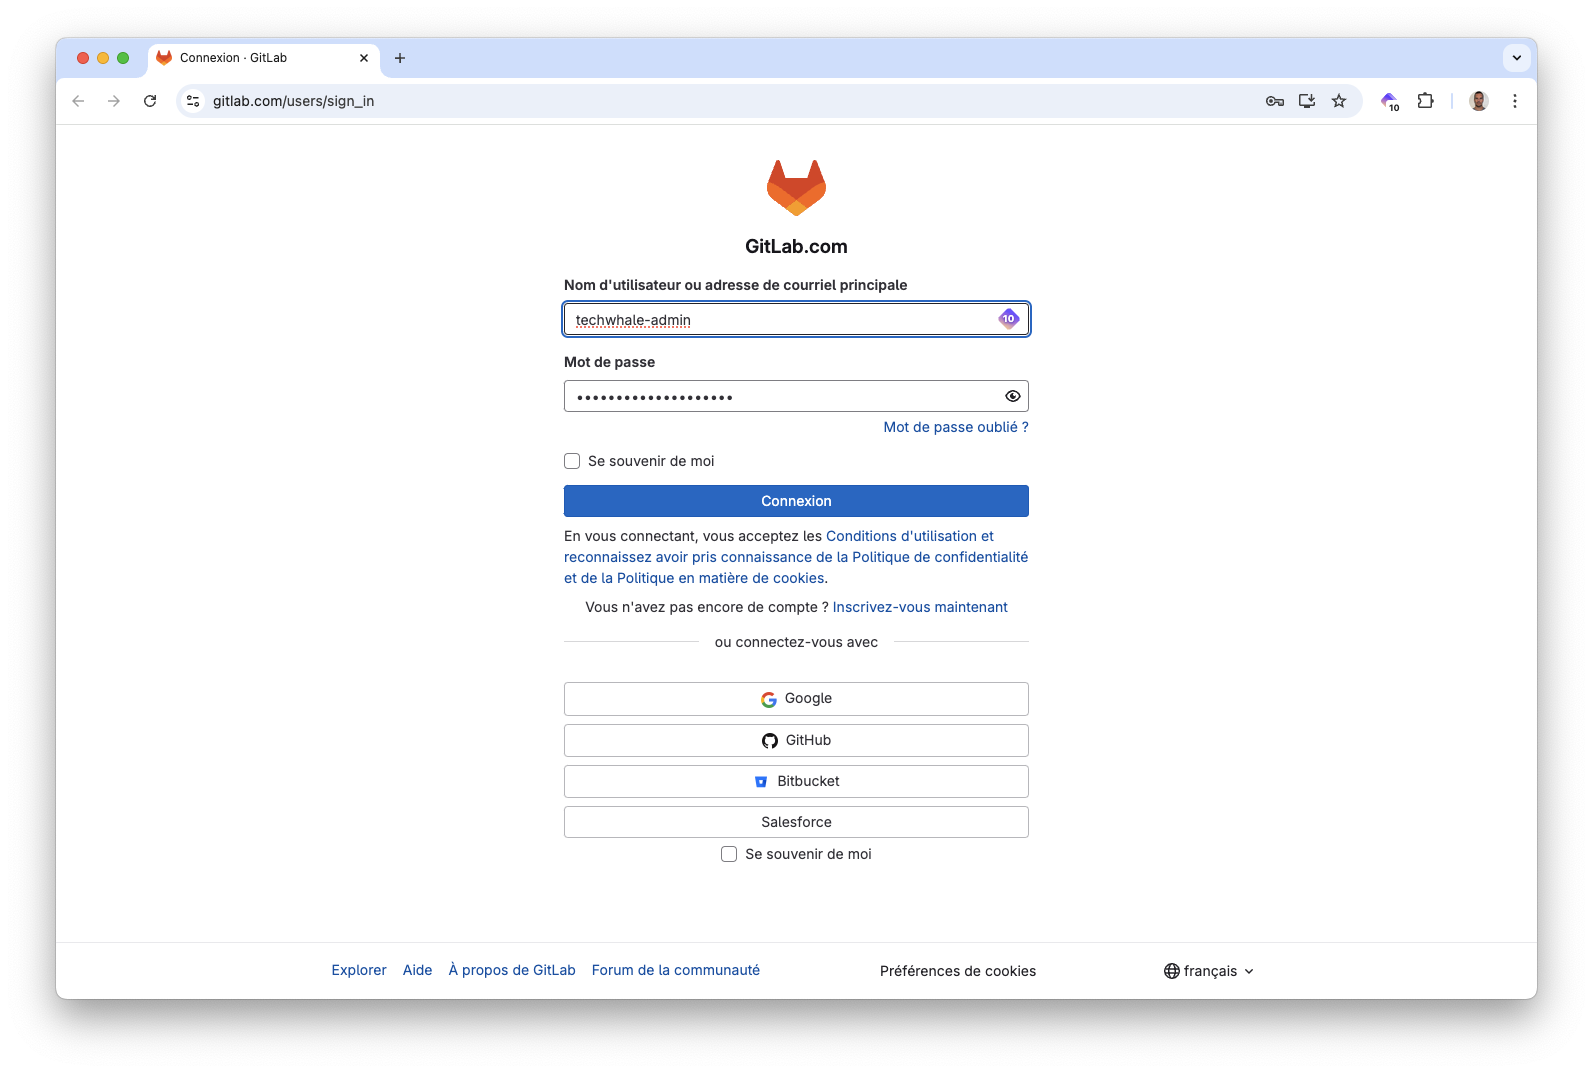
We need to accept the OpenID Connect authentication through the *K8S_OIDC* GitLab application
We can confirm the login was successful
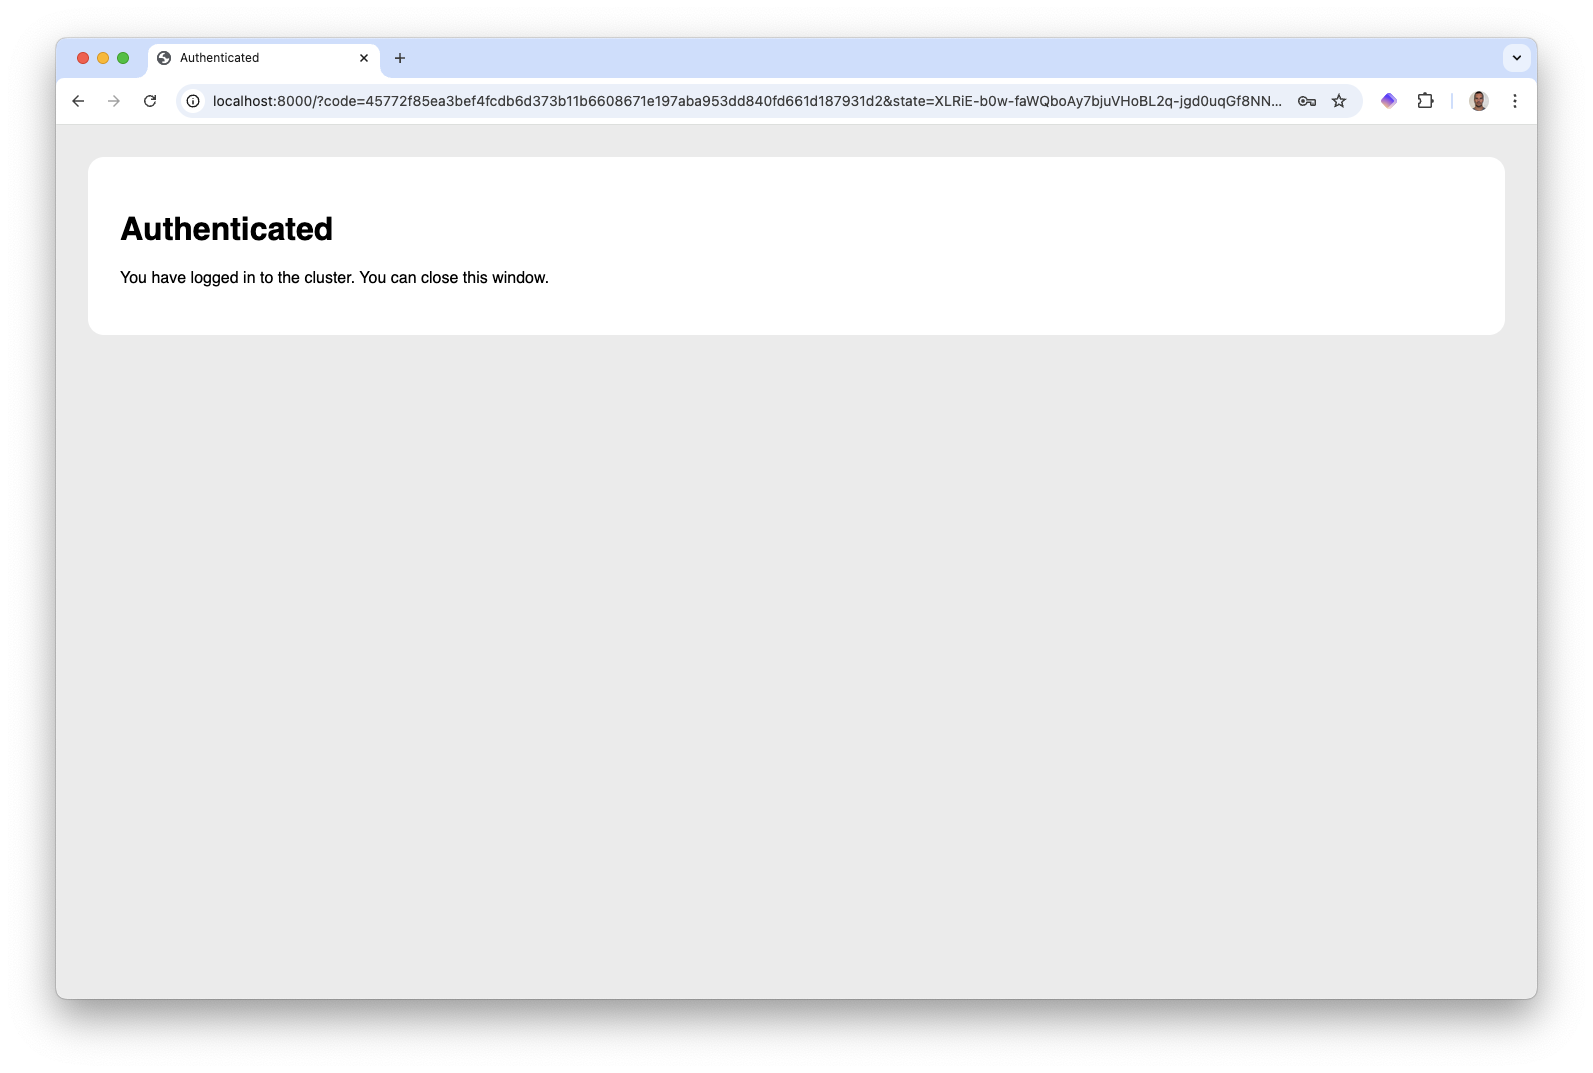
The Deployment is correctly created since the *techwhale-admin* user belongs to the *techwhale/admin* group, which has the necessary permissions. Let's now log out from GitLab and run the same command to create a simple Deployment again. The same authentication process occurs, this time we log in as *techwhale-dev*
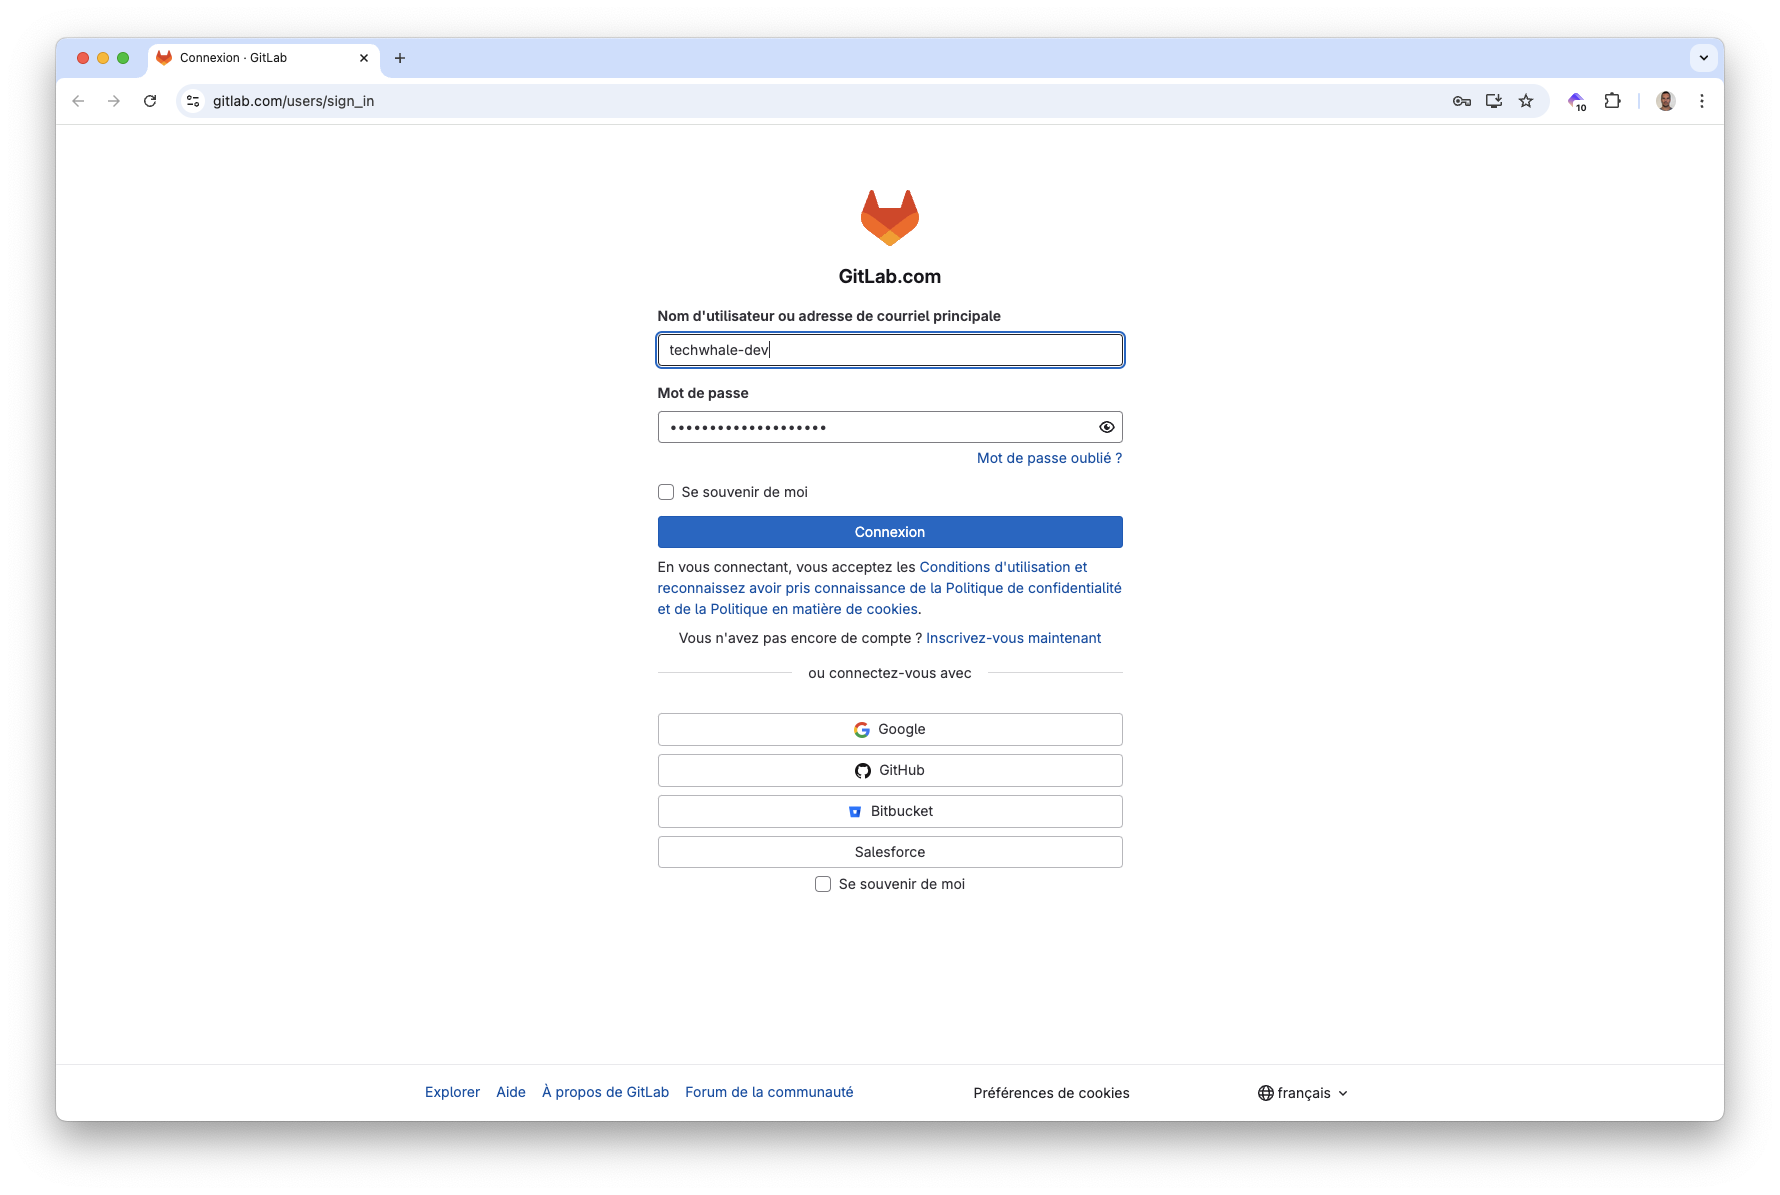
In this case the creation of the Deployment fails, as the user does not have the required permissions (*techwhale-dev* belongs to the *techwhale/viewer* group, which only has read-only permissions.)
```bash
error: failed to create deployment: deployments.apps is forbidden: User "oidc:techwhale-dev" cannot create resource "deployments" in API group "apps" in the namespace "default"
```
We could verify the authorization is correctly enforced attempting to create other resources such as Pods or Services.
## Cleanup
Using Pulumi we can delete the cluster with the following command
```bash
$ pulumi destroy
$ pulumi stack rm
```
## Key takeaways
When creating a Kubernetes cluster, we are often provided with a kubeconfig file with admin rights. If we need to assign more restrictive access to a team member, we must generate a certificate for the user, create RBAC (Role Based Access Control) resources to limit access to specific actions and specific types, and then we generate a dedicated kubeconfig file for this user. While this process can be straightforward for small teams, it can quickly become cumbersome for larger teams. In such cases, we often rely on an SSO (Single Sign-On) solution to manage authentication and authorization across all the applications used within the organization.